How to Sprout Quinoa

By Hannah Healy
Updated June 22, 2023
This post may contain affiliate links. As an Amazon Associate I earn from qualifying purchases. Please read the disclosure policy.
Sprouting quinoa is a great way to increase its nutritional value and make it easier to digest. If you’ve never sprouted quinoa before, it might seem intimidating, but it’s actually a simple process that can be done in just a few steps. In this post, we’ll walk you through how to sprout quinoa at home so you can enjoy its many health benefits.
Before we delve into how to sprout quinoa, I’ll talk a bit about why I do it. I’ve discussed the many benefits of sprouting many times before, but it’s worth mentioning again!
Sprouting and soaking grains, legumes, nuts and seeds was a common traditional practice long ago, but since the development of processed and convenience foods, it has lost it’s popularity since you have to take time and patience to sprout or soak.
Even though sprouting or soaking can take 12-36 hours, it’s mostly a “set-it-and-forget-it” pursuit. You don’t need to be in the kitchen for 12 hours watching your grains soak. You can set them up to soak or sprout and generally leave them for a long while, only coming back to maybe quickly rinse the sprouting grains every few hours.
Is sprouted quinoa better?
In short…yes. As it turns out, there’s a reason that the traditional practice of soaking and sprouting was so prevalent and spanned many continents and cultures. It has many nutritional benefits.
Sprouted quinoa health benefits
Sprouting is a process that germinates grains, seeds or legumes which in turn makes them more easily digested and produces additional vitamins and minerals including vitamin C, vitamin B and Carotene.
Another benefit to sprouting and soaking is the resulting decrease in phytic acid. Phytic acid is an enzyme inhibitor, which means that it blocks the absorption of vitamins and minerals and can also cause poor digestion and an unhealthy gut.
This may explain why many people feel bloated, gassy or intolerant of beans and grains. Some people who believe that they are gluten intolerant actually do quite well with properly sprouted grains. (If you do have grain allergies or gluten intolerance please consult your health practitioner before attempting to consume sprouted or soaked grains and do so with caution.)
Some have even linked phytic acid and improperly prepared grains to the rise in tooth decay. If you do eat grains, it’s best to soak or sprout them first.
How to Sprout Quinoa
EQUIPMENT
- 1 1 quart mason jar
- 1 Sprouting lid or mesh screen
Ingredients
- 1/2 cups quinoa
- about 3 cups filtered water
Instructions
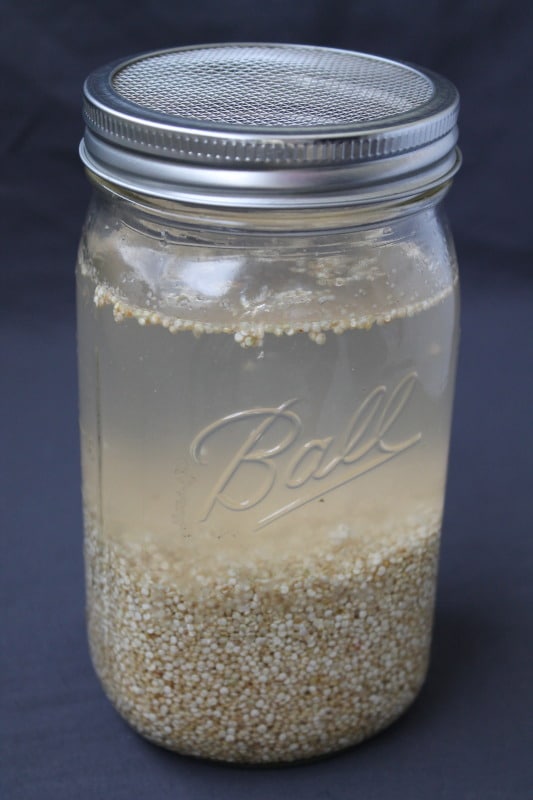
- First, rinse the quinoa thoroughly with water. Put quinoa into a 1 quart mason jar and fill the jar to the top with filtered water. Let quinoa soak for 30 minutes.
- After it has soaked pour off the water and shake off any excess, you can put the sprouting lid on the jar and use it as a strainer as well. Fill the jar with more water to rinse the quinoa, then pour it out and set the jar with sprouting lid on upside down on a bowl or container to catch excess dripping water.
- Let it sprout for about 24-36 hours. About every 8 hours, rinse with water, pour out and put upside down over bowl.
- It will take about 1-2 days for sprouts to form. You will see little thread-like sprouts coming from the grains. Once it’s done store quinoa in the fridge and use within a few days.