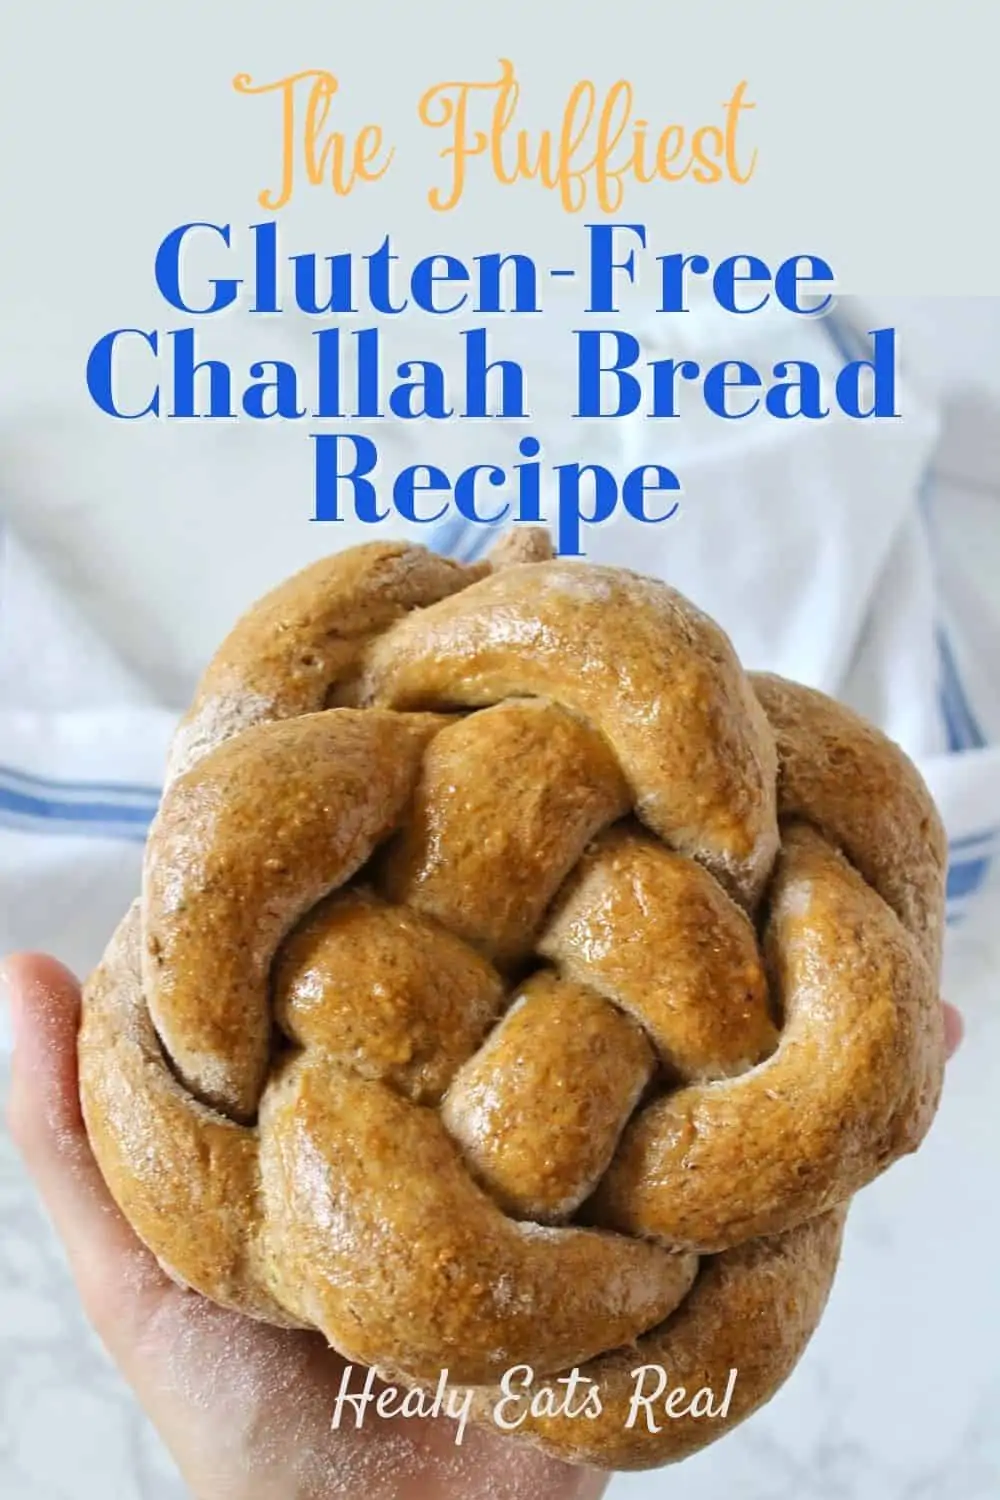
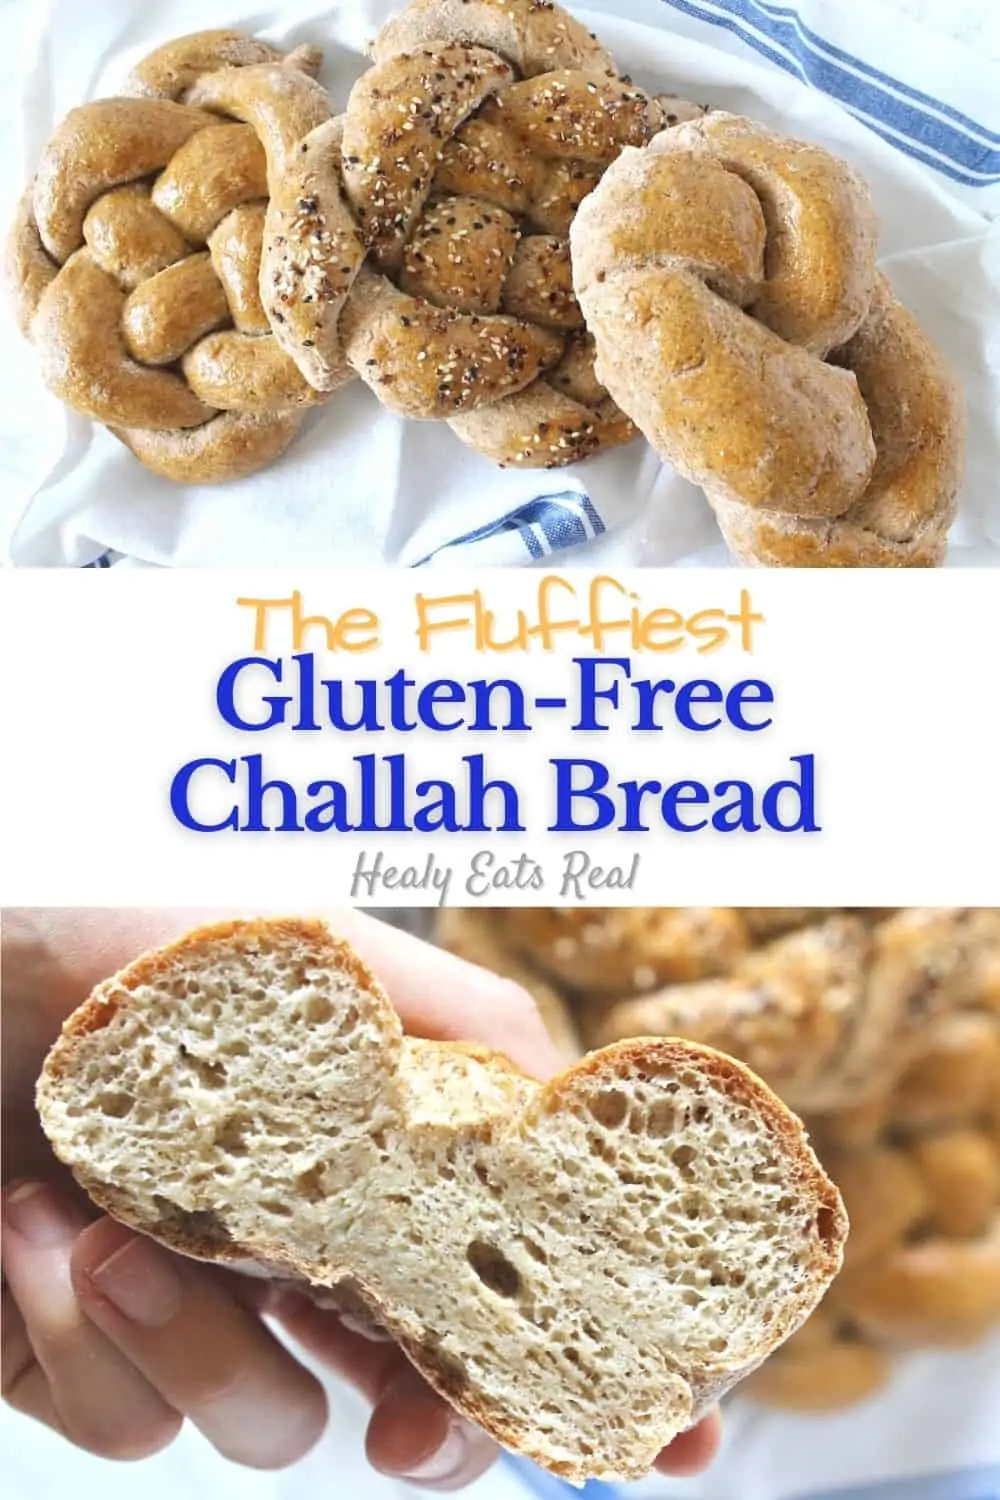
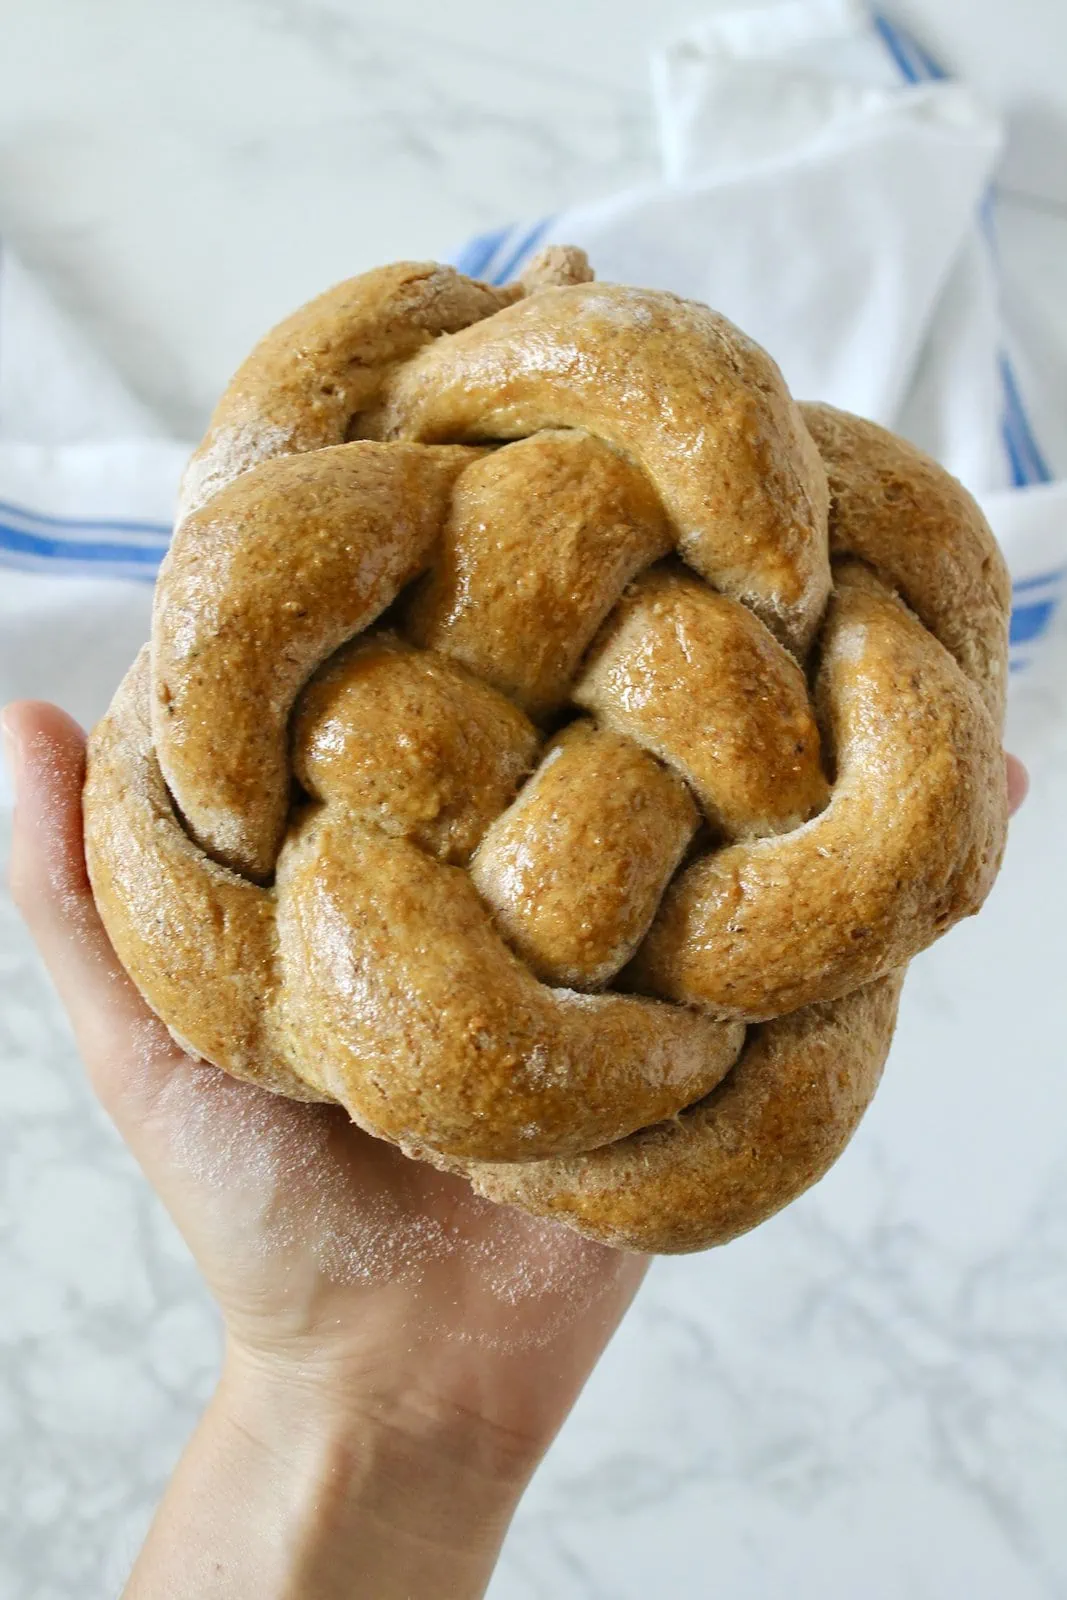
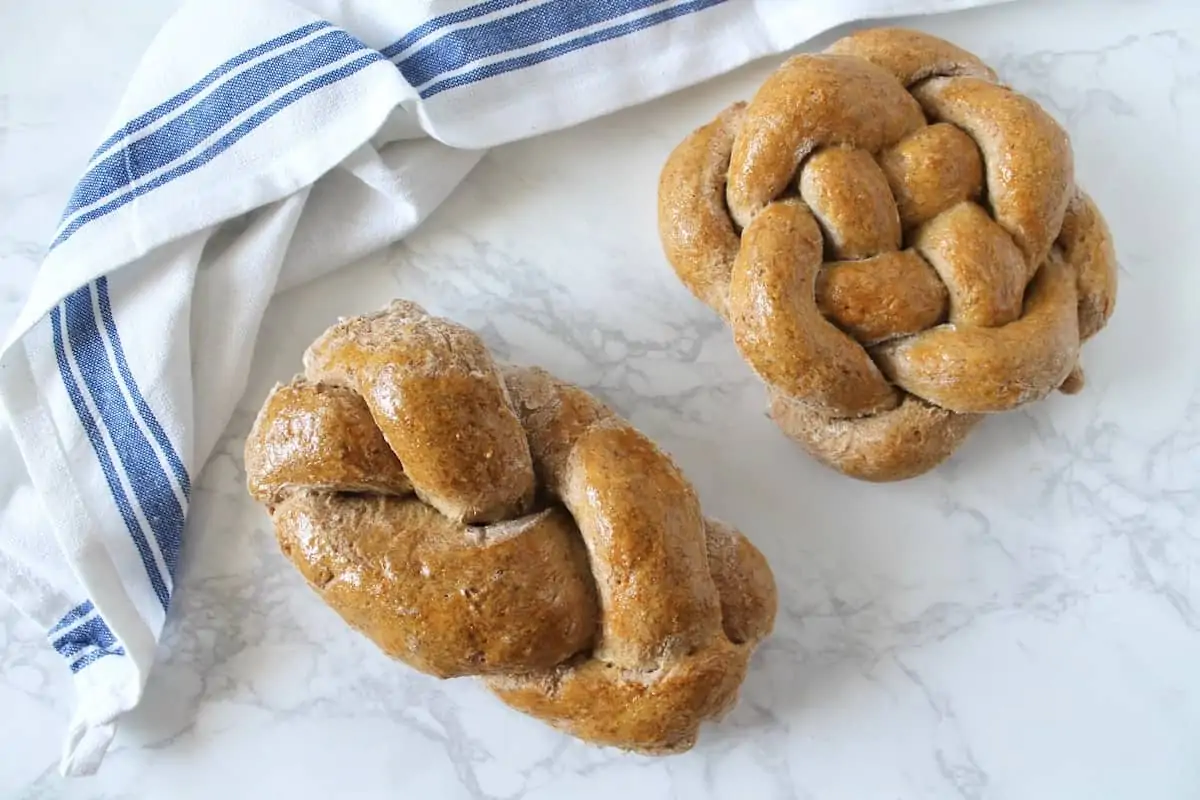
The Fluffiest Gluten Free Challah Bread Recipe

By Hannah Healy
Updated June 14, 2023
This post may contain affiliate links. As an Amazon Associate I earn from qualifying purchases. Please read the disclosure policy.
I’ve discovered the secret to fluffy, gluten free challah bread! Tired of the dense, chewy texture of gluten free bread? Learn how to get it just right with my easy step-by-step recipe.
I have been working on this amazing gluten free challah bread for so long! It’s been hard for me to find a really good loaf of gluten free challah or a recipe for one, even though I’ve been looking, so I’m super excited to finally create one that I’ve tested and approved of!
As a gluten-free Jewish person, it can be a little tough since it seems like pretty much every Jewish holiday or gathering centers around bread or gluten-containing foods, right?
We have challah every Friday for Shabbat, hamantaschen cookies for Purim, round challah for Rosh Hashana, matzo ball soup, and matzo for Passover. By the way, don’t forget to check out my gluten-free oat matzo for Passover!
Since challah is such a big part of Jewish tradition, I was happy to come up with a really great recipe for gluten free challah bread with delicious flavor and a winning texture. Although this recipe is not hamotzi-friendly (it doesn’t contain one of the five grains, including barley, rye, spelt, oats, or wheat), it’s a fun gluten free alternative to traditional challah bread. You may be able to experiment with adding gluten-free oat flour to this recipe to make it hamotzi.
Why I Love This Gluten Free Challah Recipe:
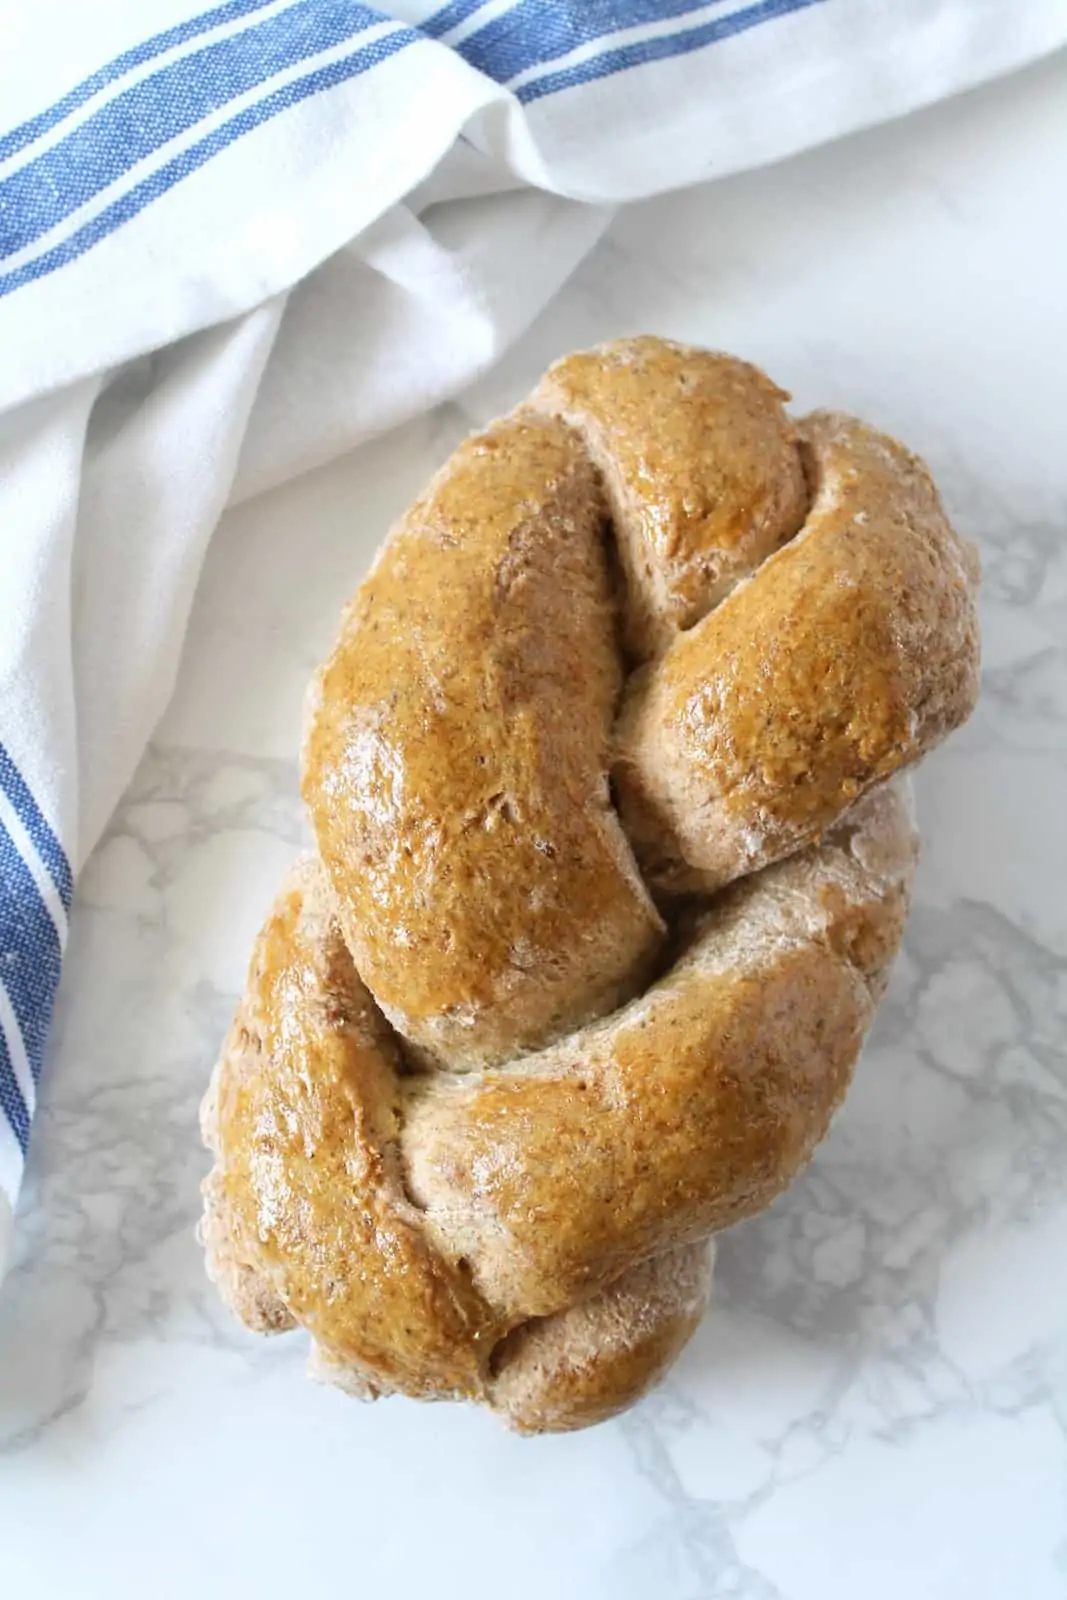
- The flavor and texture are so delicious for a loaf of gluten free bread! The inside is moist and fluffy, and the outside has a nice, crispy crust. The psyllium husk is really the star of the show here, which allows the gluten free bread to be light and fluffy with those perfect air pockets inside.
- I love that the dough holds together well enough and is easy to work with, so you’re able to braid the challah. I’ve tried a few other gluten free challah recipes and had a hard time braiding it because the dough was either too dry, crumbly, or didn’t stick together well enough.
- In addition to being gluten-free, this recipe is also naturally dairy-free!
The Secret To The Best Gluten Free Challah Bread? Psyllium Husk!
I’ve been gluten-free for probably around seven years and have tried my fair share of gluten-free bread recipes. For a while now, I’ve tried all kinds of different gluten-free challah bread recipes, specifically ones using a challah mold, ones you can braid, ones with almond flour, ones with yeast…the list goes on! I’ve discovered that the best fluffy texture comes from psyllium husk.
Psyllium husk is a fiber that comes from the seeds of the plantago ovata plant. It’s often used as a fiber supplement to help “get things moving” in the digestion department. This is something to be aware of if you are sensitive to it! See my note below under recipe tips. The great thing about psyllium husk is that it acts as a great binder in baking recipes and makes everything stick together with an airy, fluffy texture.

Should You Use Yeast In Gluten Free Challah Bread?
In my opinion, the other recipes I’ve tried that use yeast for texture just miss the mark. I found that yeast alone is not enough to make up for the lack of gluten in bread recipes, so I prefer using psyllium husk. Psyllium really helps with that bready texture!
I tried this challah recipe with and without yeast, and I found that the texture was better without yeast. However, I created an alternate recipe with yeast to keep the good texture and use less psyllium husk for people who may be sensitive to its effects (see below).
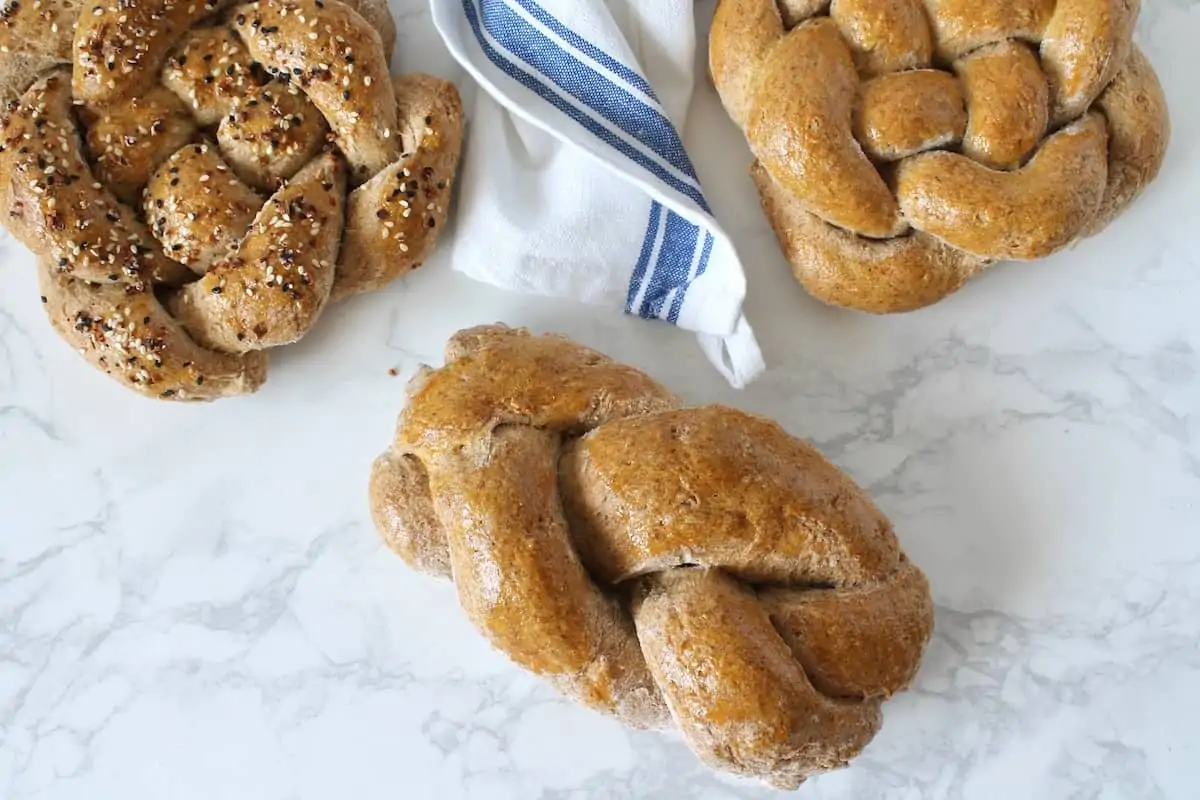
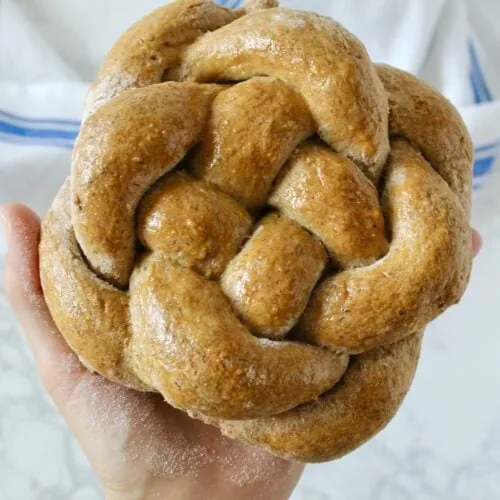
How to Braid Challah Bread
If you’re a challah novice, braiding your bread can be intimidating, but don’t worry, it’s not actually that hard once you get the idea. I’ve provided step-by-step photos below, but watching it happen on video may be easier.
You can either braid your challah as a long loaf, which is traditional for weekly Shabbat meals; see this video for instructions. You can alternatively do a round braided challah, which is traditional for rosh hashanah; see this video for instructions.
Gluten Free Challah Bread Recipe Tips
- NOTE: The main thing that provides the great texture to this recipe is the psyllium husk which is a fiber. For some people this does have the ability to affect digestion and get things moving (if you know what I mean!). For others, it has no effect on the digestive process. If you are concerned about that, I have created substitutions to include less psyllium and, therefore less digestive “movement”. In my opinion, the recipe with more psyllium is tastier and has better texture, but the other way works too if you’re sensitive to high fiber.
- If you prefer the less psyllium husk recipe, you will use quick-rise yeast and remove half of the psyllium husk from the recipe.
- I used king arthur brand of all purpose gluten free flour for this recipe, and it turned out great. Gluten free flour blends can vary quite a bit, but I would recommend one that includes xanthan gum and uses mainly rice flour and a blend of tapioca flour/starch, potato starch, and/or sorghum flour. If you use a different brand, you may end up having to add in a bit more flour towards the end or possibly more warm water depending on if it turns out too wet or too dry. This recipe probably won’t work with grain-free flour blends.
- You can either braid your challah as a long loaf, which is traditional for weekly Shabbat meals; see this video for instructions. You can alternatively do a round braided challah, which is traditional for rosh hashanah; see this video for instructions.
- Because this recipe uses psyllium husk, it may appear that the inside seems a bit wet if you insert a toothpick in the bread while it’s cooking. If you have cooked it for 80 minutes and a toothpick inserted still appears wet, it just needs time to set after cooking and won’t be undercooked inside once the bread has cooled.
- I opted not to add any sugar or honey to this recipe, but you can add a small amount of either to add a little sweetness. I would recommend starting with 1-3 tablespoons.
How to Make This Gluten Free Challah Bread Step-By-Step
*Note: these instructions are for the regular recipe with psyllium husk. If you decide to use less psyllium, follow the instructions below for using quick-rise or active dry yeast.
1. Activate the psyllium husk with hot water
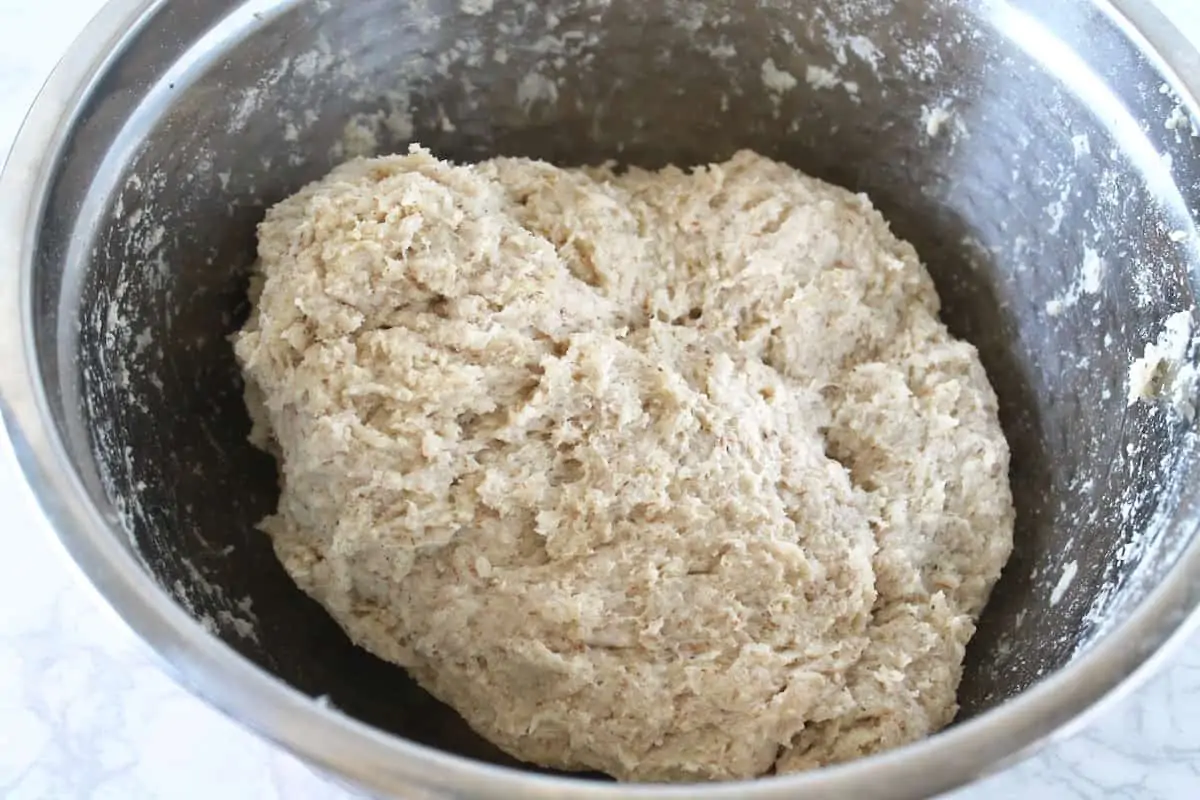
Preheat the oven to 350°F. Start by setting up 1 cup of water to boil. In a large bowl mix together dry ingredients including gluten free flour, psyllium husk, baking powder, and salt. Add in the boiling water and mix together. It may be a bit lumpy at first, but once it cools a little you can use your hands to knead it a bit.

2. Knead the dough mixture
Add the apple cider vinegar and egg whites to the dough mixture and knead together with your hands until it’s mixed together and creates a sticky but firm dough mass. The dough should be firm enough to stay together in one heap, but it should be a little sticky when you touch it. It will become less sticky as you use a little flour to shape the dough into a braided challah loaf.
Sometimes, different gluten free flour blends behave differently… If your dough is too wet and not sticking together enough, add little bits of gluten free flour until it reaches the right consistency. Alternatively, if the dough is too firm, add a little bit of warm water until it reaches the right consistency.
3. Transfer dough to a floured surface
Lightly sprinkle your hands and a clean counter, chopping block, or large cutting board with gluten free flour. Don’t use too much flour to work with the bread dough or it may dry out. Only use enough to prevent sticking.
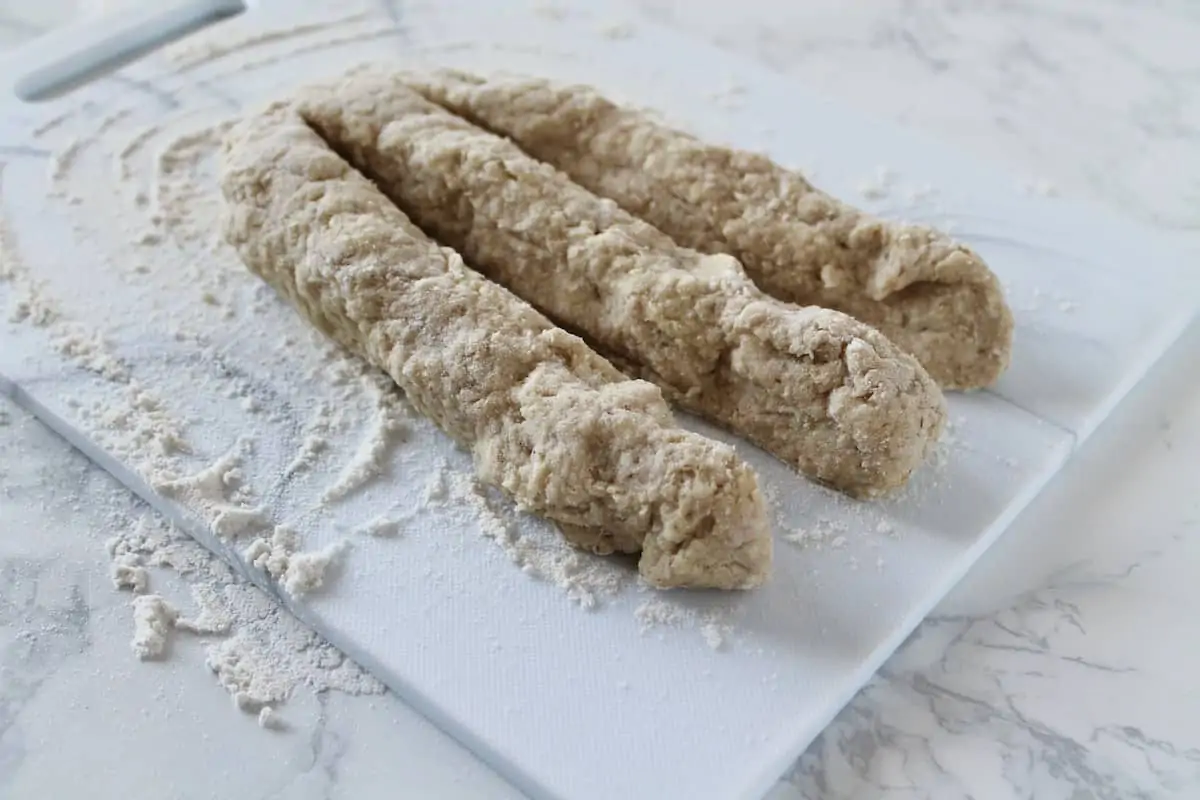
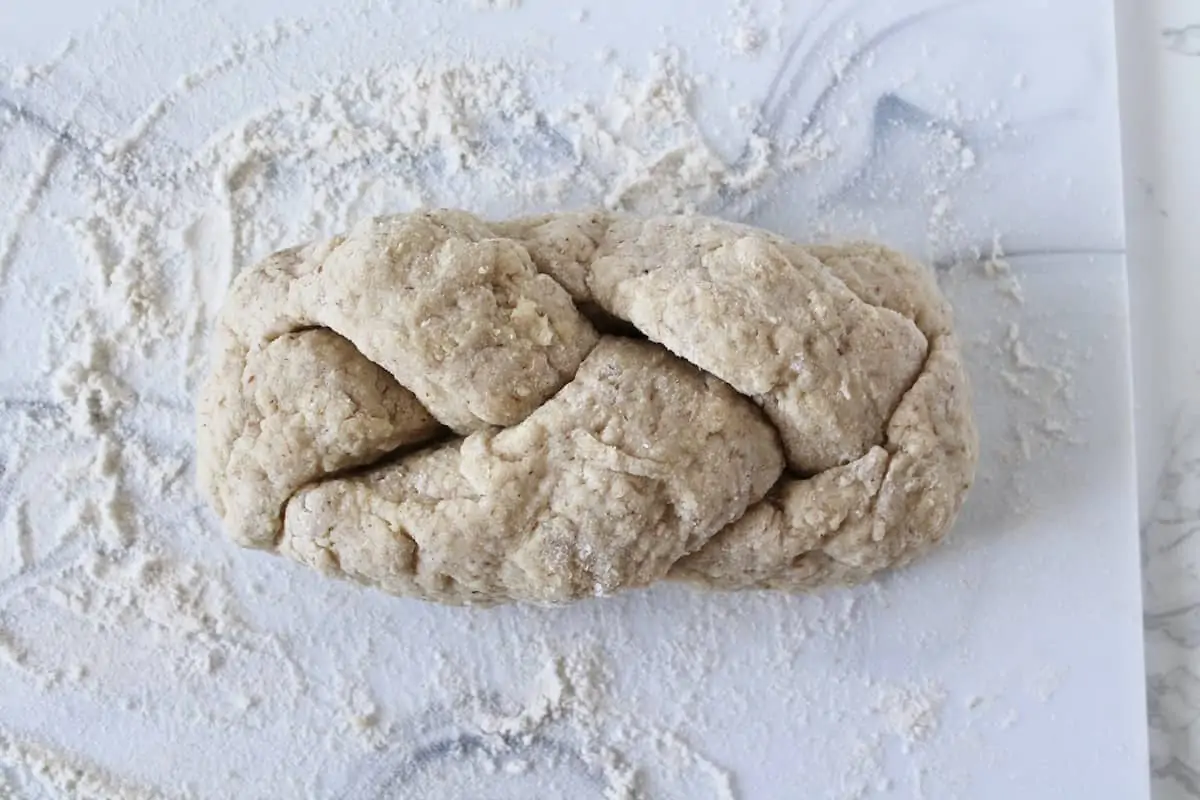
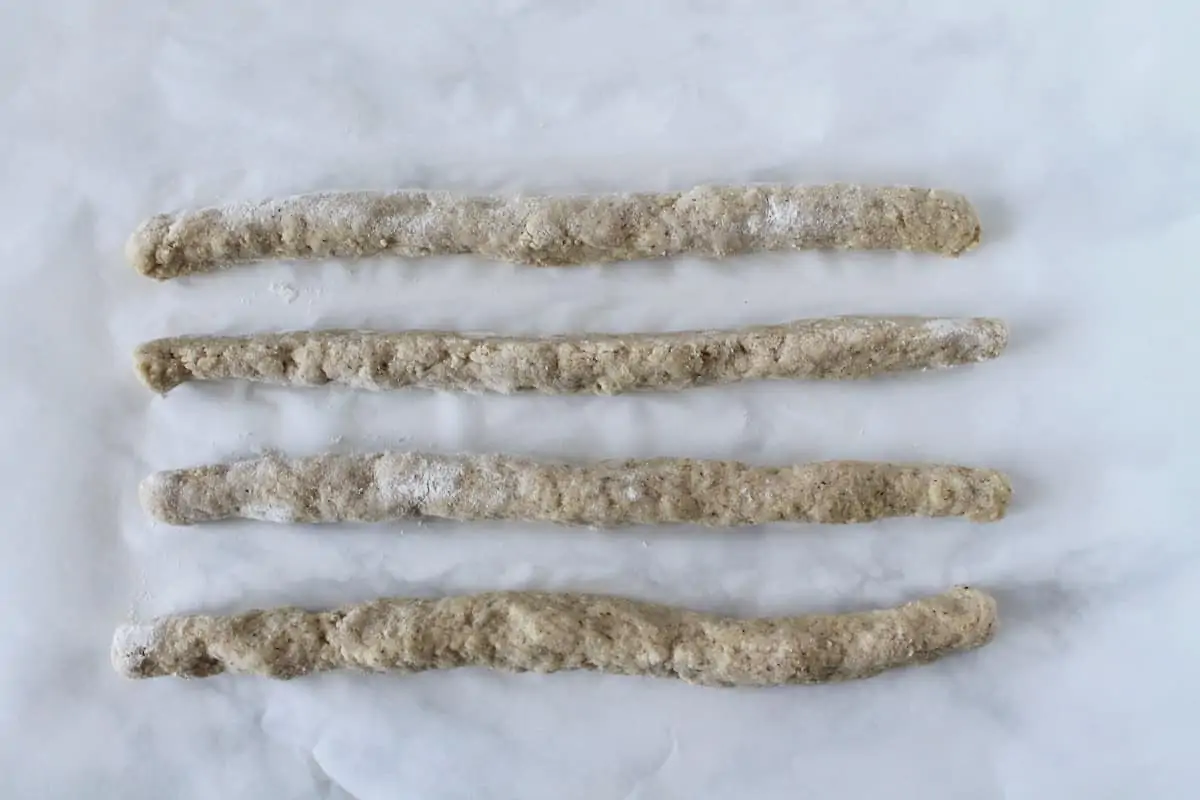
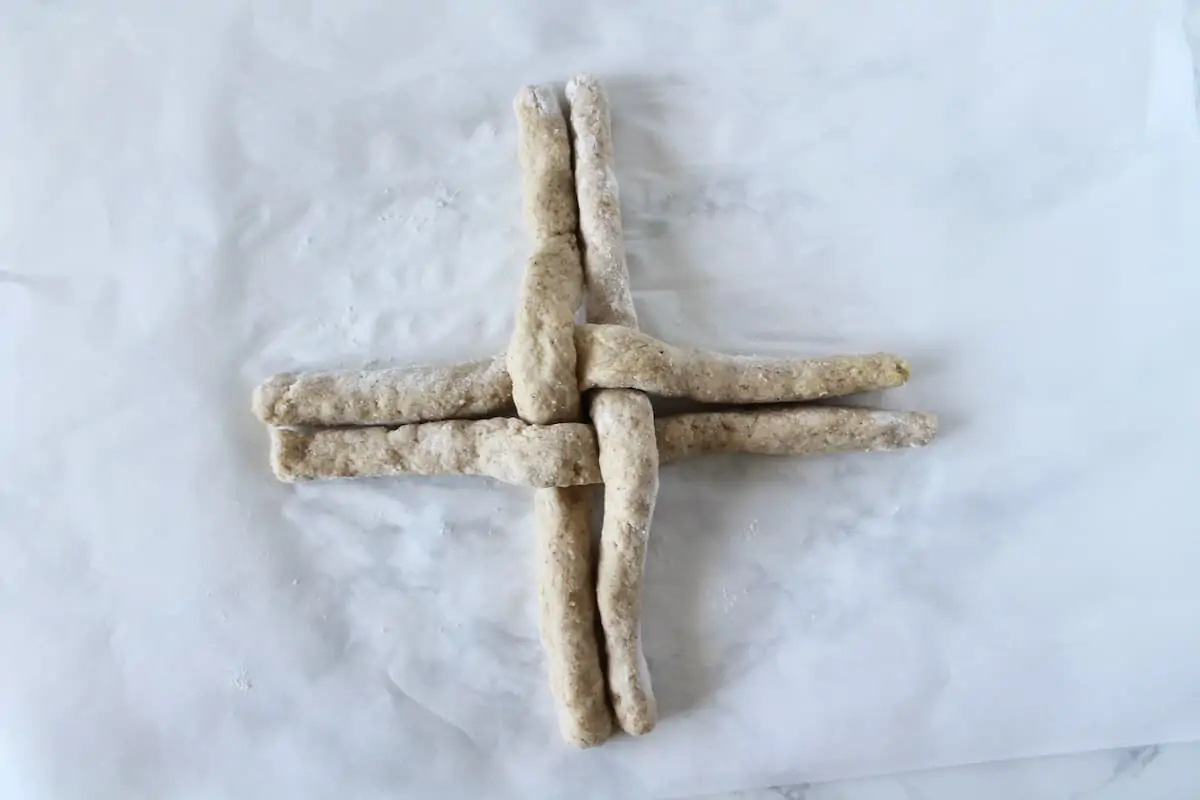
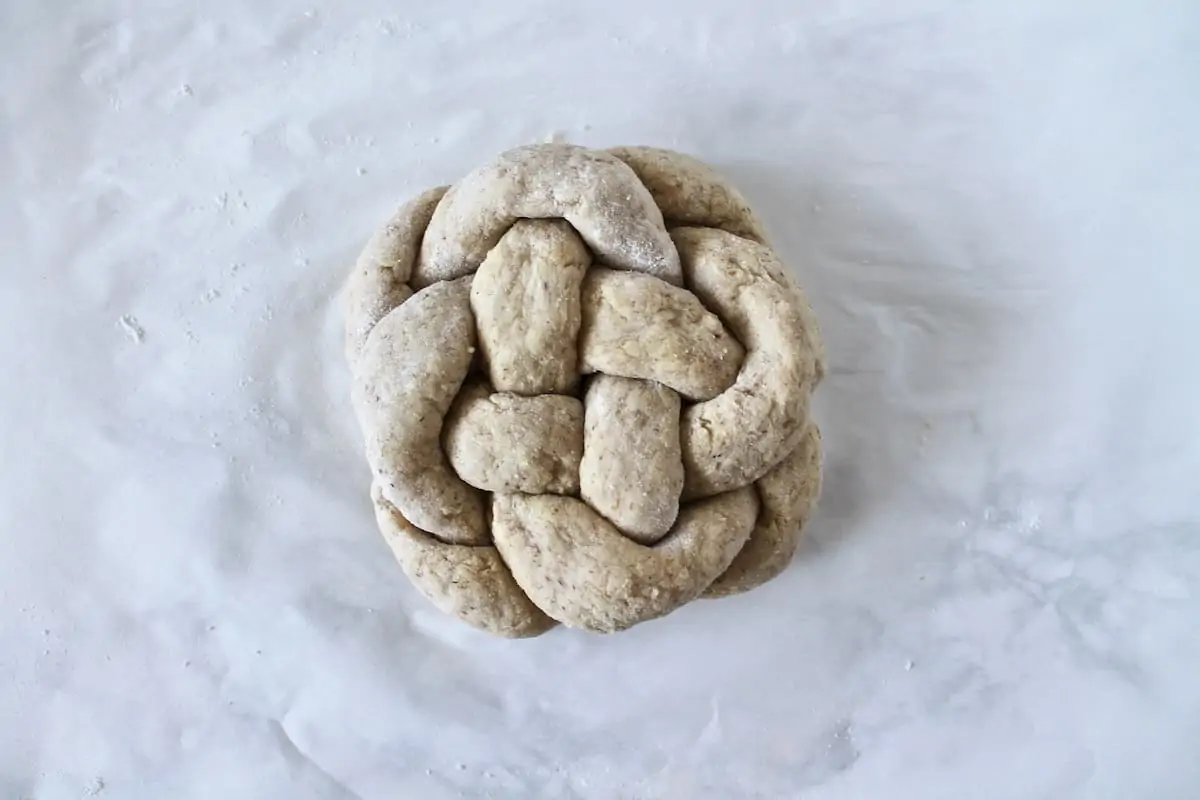
4. Braid the dough
Separate the dough evenly into rope-like shapes depending on whether you are making a regular braided challah loaf or a round loaf. If it’s a regular long loaf, you’ll need three ropes. If it’s a round braided loaf, you’ll need four ropes. Place the bread dough ropes onto the floured surface and braid it (see images above for instructions on braiding). You can watch this video for a long braided loaf or this video for a round braided loaf.

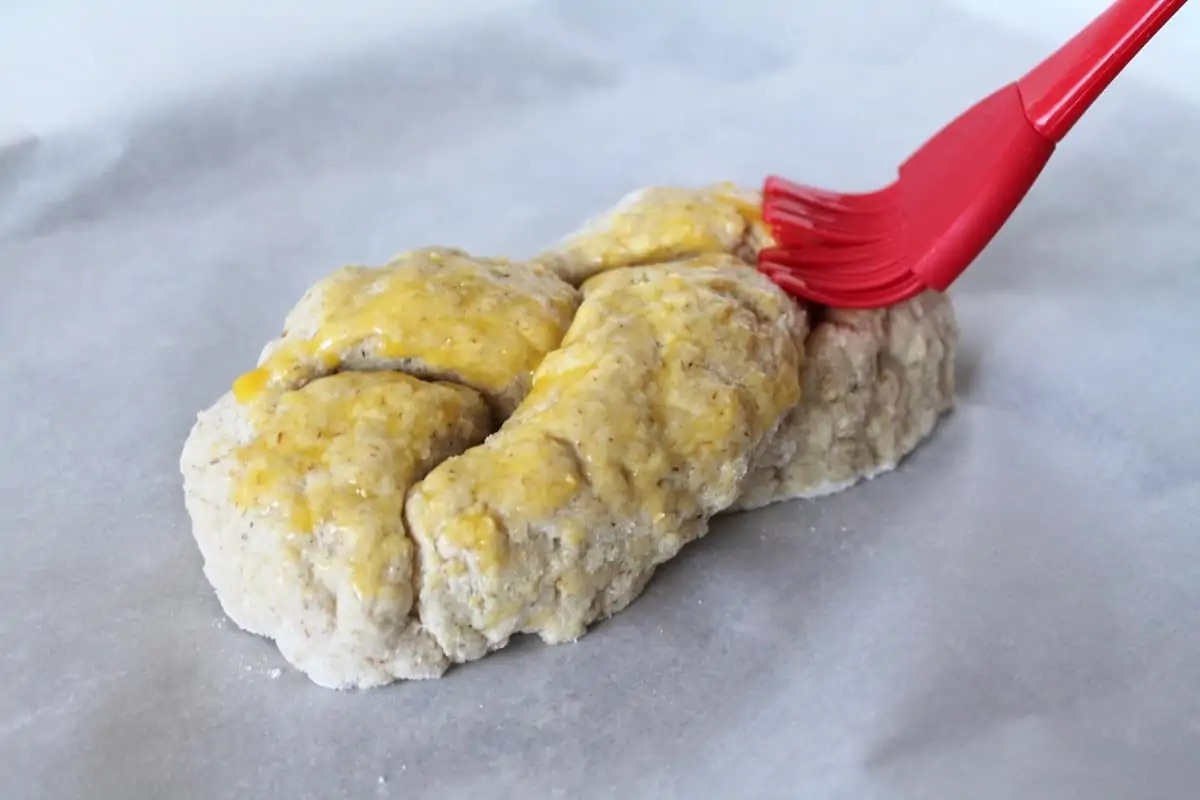
5. Add egg wash and toppings
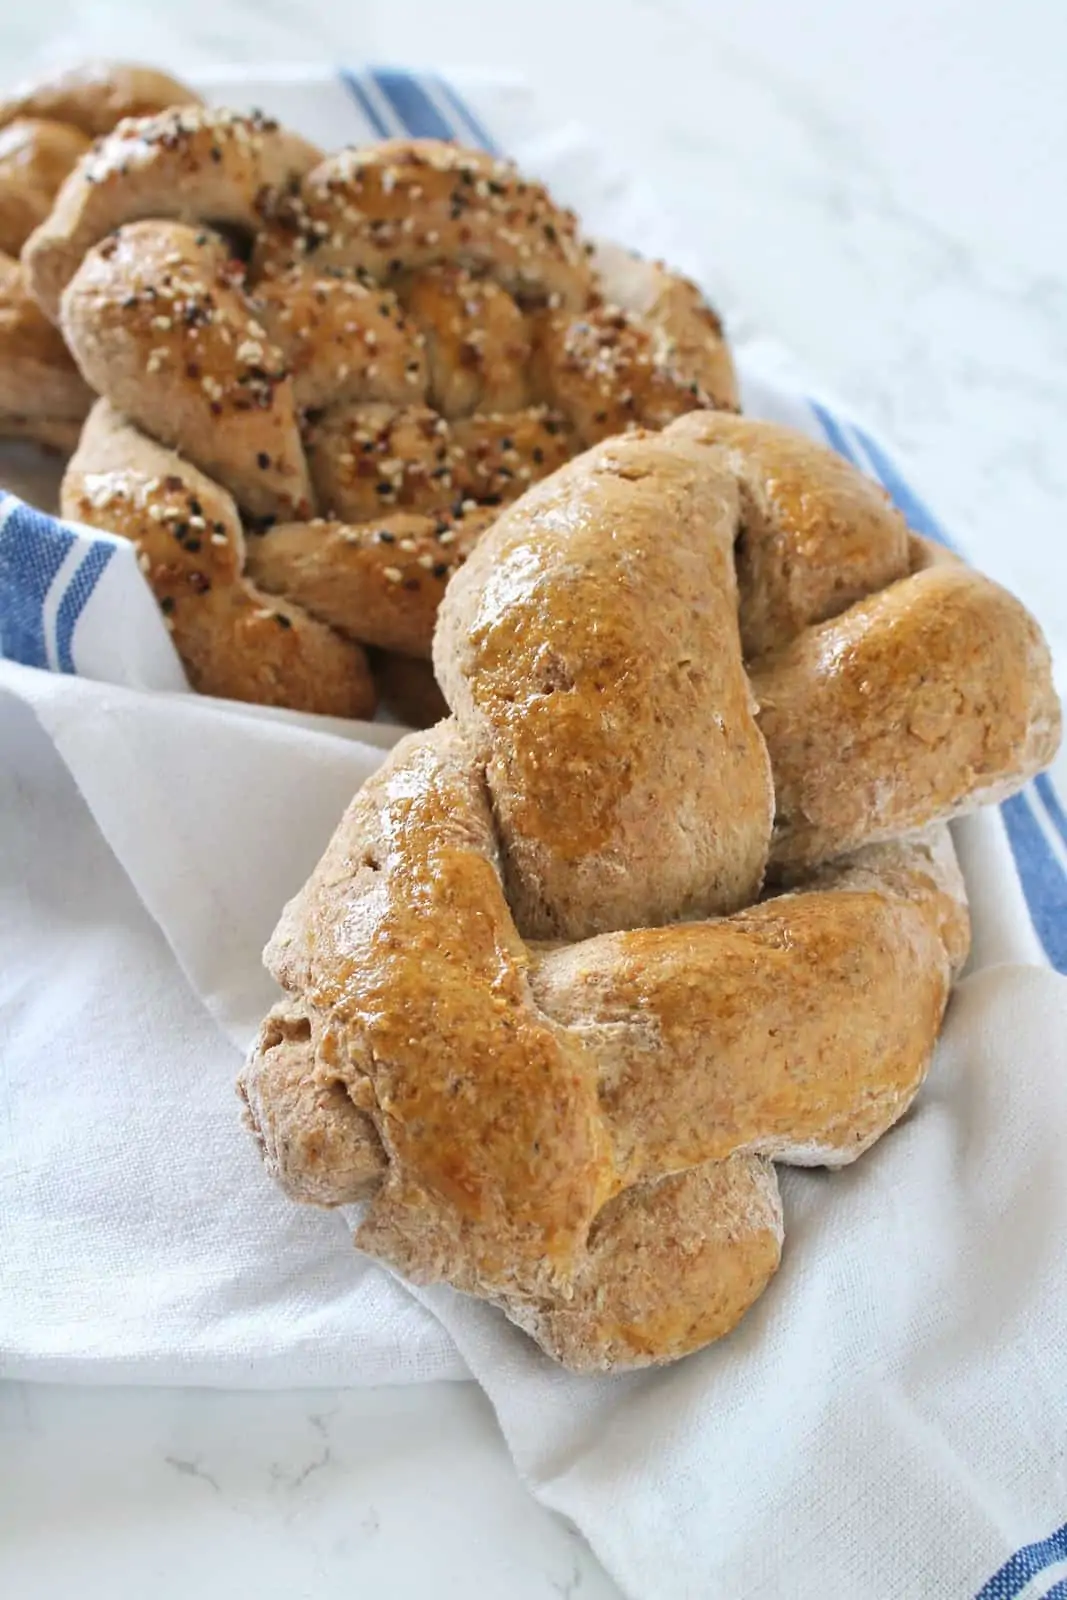
Put one egg yolk in a small ramekin or shallow dish. Use a brush to brush the top of the braided loaf with egg yolk to make the bread shinier on top after baking.
Optionally, add sesame seeds or bagel seasoning to the top of the bread before baking. You can also leave it as is without toppings.

6. Bake the bread
Place the braided challah dough onto a baking sheet pan lined with parchment paper and put into an oven that has been preheated to 350°F. Allow to cook for 60-80 minutes. Cooking times may vary depending on the oven. Mine ended up taking 80 minutes. rabbi
Because this recipe uses psyllium husk it may appear that the inside seems a bit wet if you insert a toothpick in the bread while it’s cooking. If you have cooked it for 80 minutes and a toothpick inserted still appears wet, it just needs time to set after cooking and won’t be undercooked inside once the bread has cooled.
The Fluffiest Gluten Free Challah Bread
Ingredients
- 1 1/4 cup All purpose gluten free flour
- 1/4 cup psyllium husk* see note below
- 2 tsp baking powder
- 1 tsp salt
- 2 tsp apple cider vinegar
- 1 cup boiling water
- 4 egg whites
- 1 egg yolk
Optional for less psyllium husk version (*see recipe notes):
- 1 packet gluten free quick rise yeast
- 1/2 tsp sugar
Instructions
Regular recipe with psyllium husk (*see note below):
- Pre-heat the oven to 350°F.
- Start by setting up 1 cup of water to boil.
- In a large bowl mix together dry ingredients including gluten free flour, psyllium husk, baking powder and salt.
- Add in the boiling water and mix together. It may be a bit lumpy at first, but once it cools a little you can use your hands to knead it a bit.
- Add in the apple cider vinegar and egg whites to the dough mixture and knead together with your hands until it's mixed together and creates and sticky but firm dough mass.
- The dough should be firm enough to stay together in one heap but it should be a little sticky when you touch it. It will become less sticky as you use a little flour to shape the dough into a braided challah loaf. Sometimes different gluten free flour blends behave differently… If your dough is too wet and not sticking together enough, add little bits of gluten free flour until it reaches the right consistency. Alternatively, if the dough is too firm, add a little bit of warm water until it reaches the right consistency.
- Lightly sprinkle your hands and a clean counter, chopping block or large cutting board with gluten free flour. Don't use too much flour to work with the bread dough or it may dry out. Only use enough to prevent sticking.
- Separate the dough evenly into rope-like shapes depending on if you are making a regular braided challah loaf or a round loaf. If it's a regular long loaf, you'll need 3 ropes. If it's a round braided loaf, you'll need 4 ropes. Place the bread dough ropes onto the floured surface and braid it (see images above for instruction on braiding). You can watch this video for a long braided loaf or this video for a round braided loaf.
- Put 1 egg yolk in a small ramekin or shallow dish. Use a brush to brush the top of the braided loaf with egg yolk to make the bread shinier on top after baking.
- Optionally you can also add sesame seeds or bagel seasoning to the top of the bread before baking. You can also leave it as is without toppings.
- Place the braided challah dough onto a baking sheet lined with parchment paper and put into an oven that has been pre-heated to 350°F. Allow to cook for 60-80 minutes. Cooking times may vary depending on the oven. Mine ended up taking 80 minutes.
- Because this recipe uses psyllium husk it may appear that the inside seems a bit wet if you insert a toothpick in the bread while it's cooking. If you have cooked it for 80 minutes and a toothpick inserted is still appearing wet, it just needs time to set after cooking and won't be undercooked inside once the bread has cooled.
Recipe with less psyllium husk with added yeast (*see note below):
- If you prefer the less psyllium husk recipe, you will use quick rise yeast and use 2 tbsp of psyllium husk instead of 1/4 cup.
- Pre-heat the oven to 350°F.
- Start by activating the yeast by dissolving 1 packet of quick rise yeast in 1/4 cup of warm water that is between 110-115°F then add in 1/2 tsp of sugar (this is needed to activate the yeast). Wait for the foam to double in volume. If the foam doesn't rise, then the water used was too hot, too cold or the yeast has gone bad.
- Next, set up 3/4 cup of water to boil.
- In a large bowl mix together the dry ingredients including gluten free flour, 2 tbsp of psyllium husk, baking powder and salt.
- Add in the 3/4 cups of boiling water and mix together. It may be a bit lumpy at first, but after you add the remaining ingredients and it cools a little you can use your hands to knead it a bit.
- Add in the apple cider vinegar and egg whites to the dough mixture and mix together.
- Once the yeast has been activated and the foam has doubled in size, add it to the dough mixture. Knead with your hands until it's mixed together and creates and sticky but firm dough mass.
- Follow instructions #6-12 in the instructions above to finish the recipe.
Notes
- NOTE: The main thing that provides the great texture to this recipe is the psyllium husk which is a fiber. For some people this does have the ability to affect digestion and get things moving (if you know what I mean!), for others it has no effect on the digestive process. If you are concerned about that, I have created substitutions to include less psyllium and therefore less digestive “movement”. In my opinion the recipe with more psyllium is tastier and has better texture, but the other way works too if you’re sensitive to high fiber.
- If you prefer the less psyllium husk recipe, you will use quick rise yeast and remove half of the psyllium husk from the recipe.
- I used king arthur brand of all purpose gluten free flour for this recipe and it turned out great. Gluten free flour blends can vary quite a bit, but I would recommend one that uses mainly rice flour and a blend of tapioca starch, potato starch and/or sorghum flour. If you use a different brand you may end up having to add in a bit more flour towards the end or possibly more warm water depending on if it turns out too wet or too dry. This recipe probably won’t work with grain-free flour blends.
- You can either braid your challah as a long loaf which is traditional for weekly shabbat meals, see this video for instructions. You can alternatively do a round braided challah which is traditional for rosh hashanah, see this video for instructions.
- Because this recipe uses psyllium husk it may appear that the inside seems a bit wet if you insert a toothpick in the bread while it’s cooking. If you have cooked it for 80 minutes and a toothpick inserted is still appearing wet, it just needs time to set after cooking and won’t be undercooked inside once the bread has cooled.
Nutrition